HubSpot Connector
Use HubSpot CRM data in dashboards or AI pipelines. Sync contacts, deals, companies, and other CRM objects automatically.
Connect your HubSpot CRM to AI pipelines and sync contacts, deals, companies, and other CRM objects automatically.
Setup Instructions
1. Navigate to Data Integrations
Go to one of your flows, then click on the Data Integrations tab and select Select an Integration.
2. Select HubSpot Integration
Search for HubSpot in the list and click Connect.
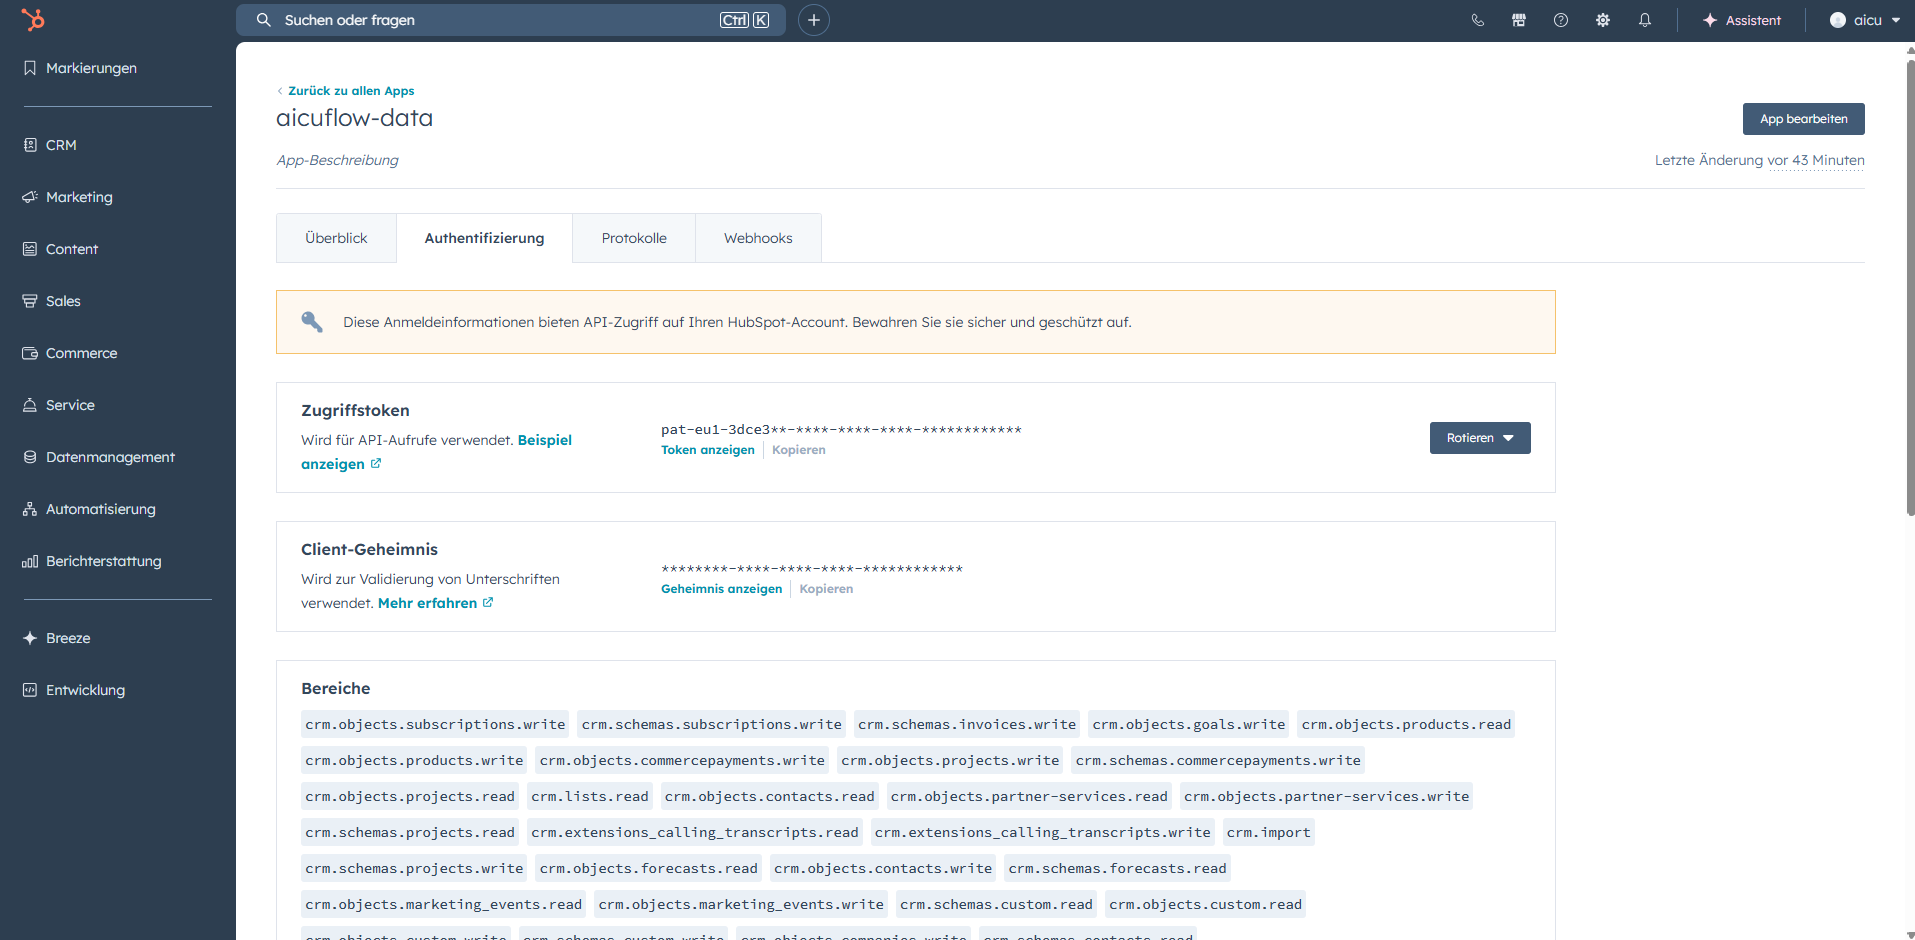
3. Create a Private App in HubSpot
To connect HubSpot, you need to create a Private App and obtain an access token:
- In HubSpot, click the Settings icon (gear icon) in the top navigation bar
- In the left sidebar, navigate to Integrations > Private Apps e.g. https://app-eu1.hubspot.com/private-apps/
- Click Create a private app
- Give your app a descriptive name (e.g., "AIcu Integration")
- Go to the Scopes tab and select the permissions your connector needs — under the CRM section, enable read access for the object types you want to sync (e.g., contacts, deals, companies, tickets)
- Click Create app and confirm
- Copy the Access Token shown — you will not be able to see it again after leaving this page
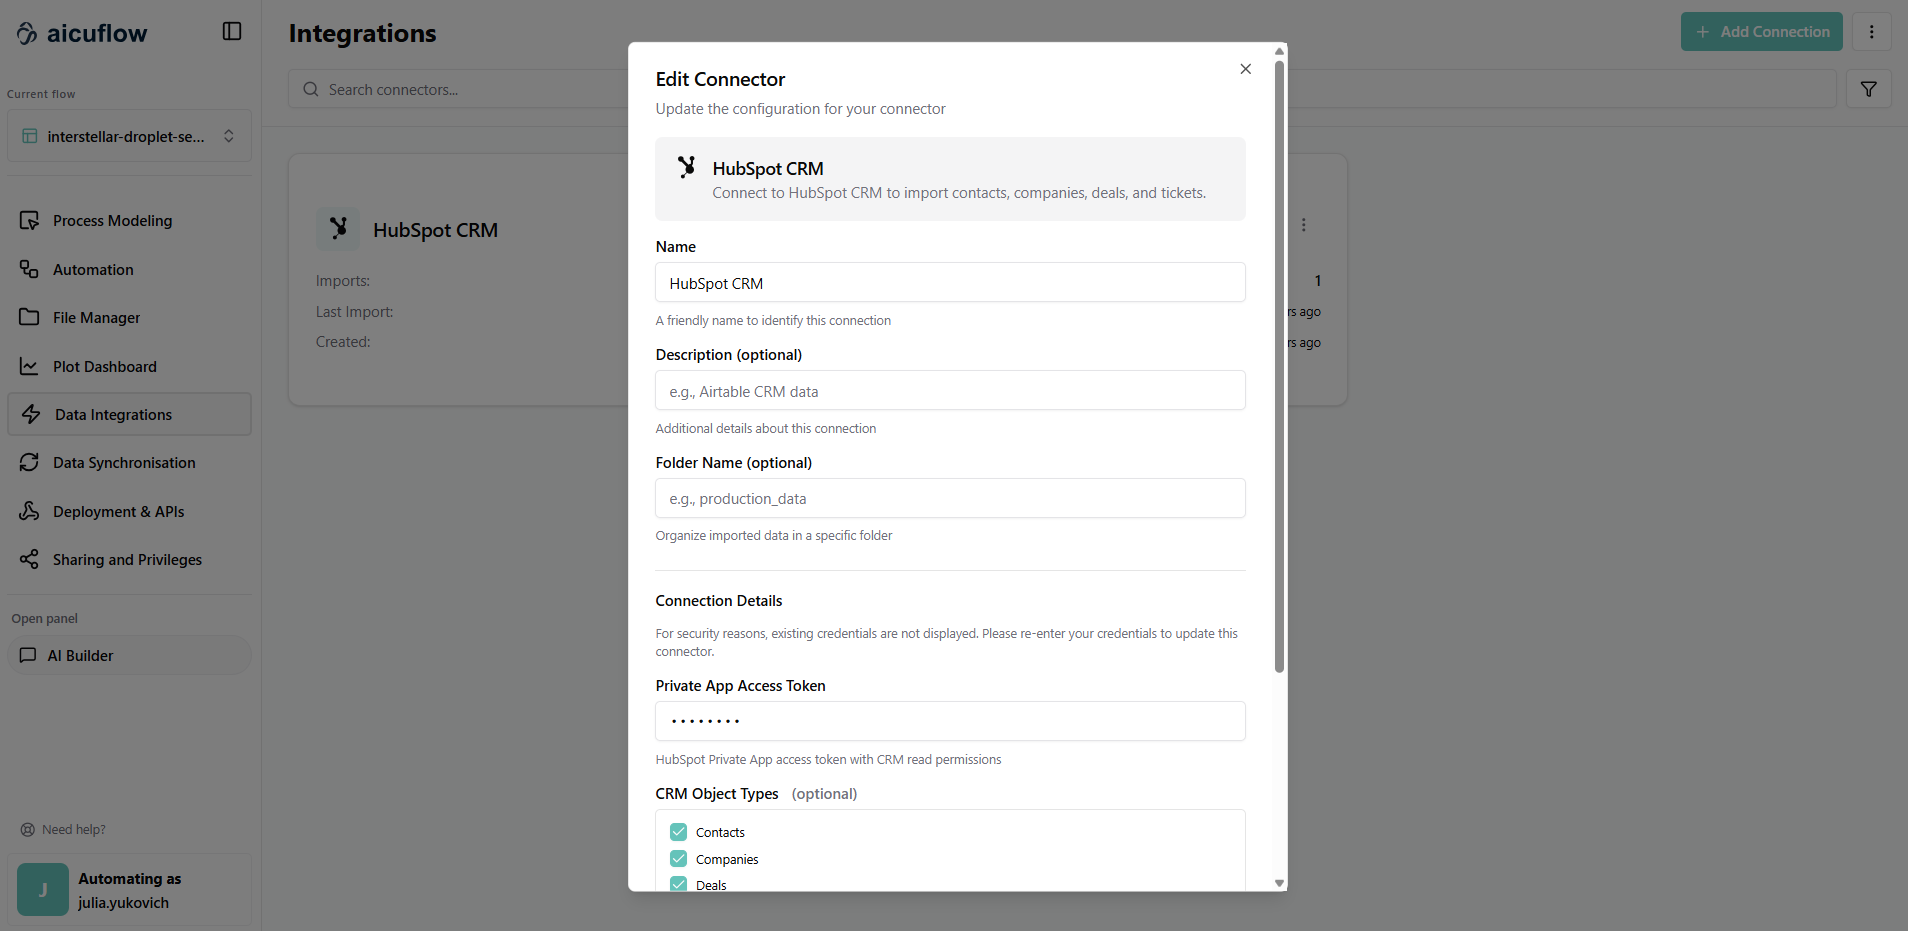
4. Configure the Connector
Back in the connector setup, fill in the following fields:
- Connector Name: Give your connector a descriptive name (e.g., "HubSpot CRM")
- CRM Object Types: Select the HubSpot object types you want to import (e.g., Contacts, Deals, Companies, Tickets)
- Private App Access Token: Paste the access token you copied from HubSpot
Note: After you create the connector, you won't be able to view the access token again for security reasons. You can always update it if needed.
5. Create a Sync Job (Optional)
To automatically keep your HubSpot data up to date, set up a sync job:
- Navigate to Data Synchronization and click the calendar icon
- Click Create Sync Job
- Select the HubSpot connector you just created from the dropdown
- Give the sync job a descriptive name
- Choose a Sync Interval:
- Every 3 hours — suitable for most CRM use cases
- Every minute — for near real-time needs (use cautiously)
- Custom — set your own schedule
- Click Save to activate the sync job
6. Monitor and Access Your Data
Check Import Status:
Navigate to Data Synchronization to monitor your import. You'll see whether the import succeeded or failed.
View Your Imported Data:
- Once the sync completes, go to File Manager (Data Management)
- Navigate to the folder where your data was stored
- Click any file to preview the CRM data
- All records from your selected HubSpot object types will be available for use in your AI pipelines
Important Notes:
- On every sync, a new version of your data is created
- Make sure the scopes you granted in the Private App match the object types you selected in the connector. Missing scopes will cause import errors